


Fermenting Dill Pickles: Easy Homemade Recipe and Step-by-Step Guide
Dill Pickles like Grandma used to make

I can remember as a young girl watching my Mom and my Nan, preserving and canning the garden harvests as well as many fruits of the summer. Pickles, relishes, tomatoes and fruit. Our cold storage in the basement was always full of these foods to last our family until the next year.
Preserving and canning foods has really become a lost art. Although I do see a big comeback of this homesteading process. I mean, why take the time to preserve foods when we can just get it from the grocery store down the street. Now, thanks to big food and big farms, fruits and vegetables are grown in warmer climates and more available year round, shipped worldwide. But many years ago this was not the case. Lots of people had their own gardens and needed a way to keep the food lasting for months, so they preserved and canned foods.
Being that I was brought up with these foods, it was hard for me to eat canned, processed foods from the grocery store. The taste was not the same and many also contained food additives to increase shelf life, colour the food and enhance flavour. Even though I did not have the space for a garden, I am a huge supporter of local farms and farmers markets. I buy their harvest and preserve the foods myself using the recipes from my Mom and Nan.
There is nothing like the crunch of a real fermented dill pickle, the fresh taste of canned tomatoes, like they were straight off the vine, and enjoying a relish that was not highlighted with fake green colour.
Since we are heading into harvest season, I thought I would share with you my recipe for dill pickles.
Depending on where you live, it is almost harvest season and as long as the weather has cooperated, we will start seeing pickling cucumbers showing up in the farmer's markets. Getting to the markets early ensures that you find the freshest products. I always look for cucumbers that are not too big and not too small. Usually the market stand you get the cucumbers from will have fresh garlic and dill weed as well.
This recipe is for fermented pickles and does not require any type of heat processing. Although you can if you wish and I will explain that in the recipe.
What You Need:
This recipe is for 10 lbs of pickling cucumbers
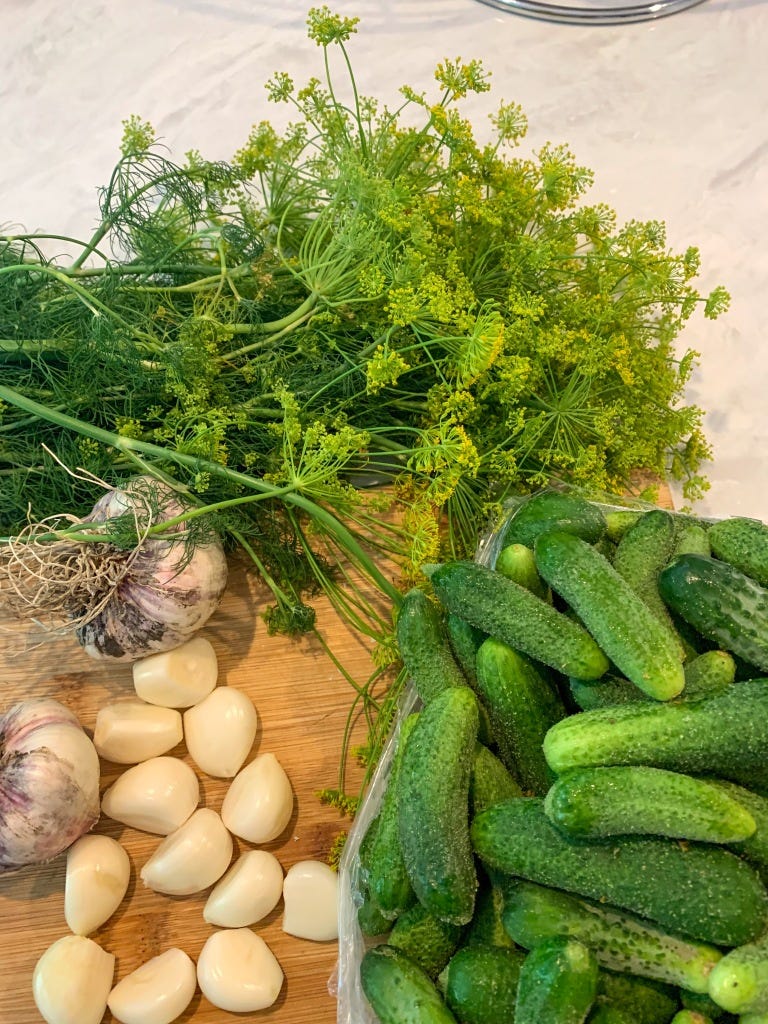
fresh garlic bulbs
dill weed
1 litre wide mouth jars ( I use the Bernardin jars) approximately 8 jars required)
new snap lids and screw tops
white (pickling) vinegar
coarse (pickling) salt
water
a large saucepan for lids
Large dutch oven or kitchen pot for brine
Thick towels
Steps to Easy Homemade Dill Pickles
First I put all the cucumbers in the kitchen sink in very cold water with ice and make sure they are clean.
During that time I also get my jars and lids together. I place the clean jars in the sink and run hot water in them. I then place the snap lids and screw tops in a saucepan and fill with water.
Peel the fresh garlic into individual cloves and cut the dill weed into approx 6 inch sizes.
Fill a large dutch oven or kitchen pot with
1 quart of pickling (white) vinegar
3 quarts of water
1 cup coarse (pickling) salt
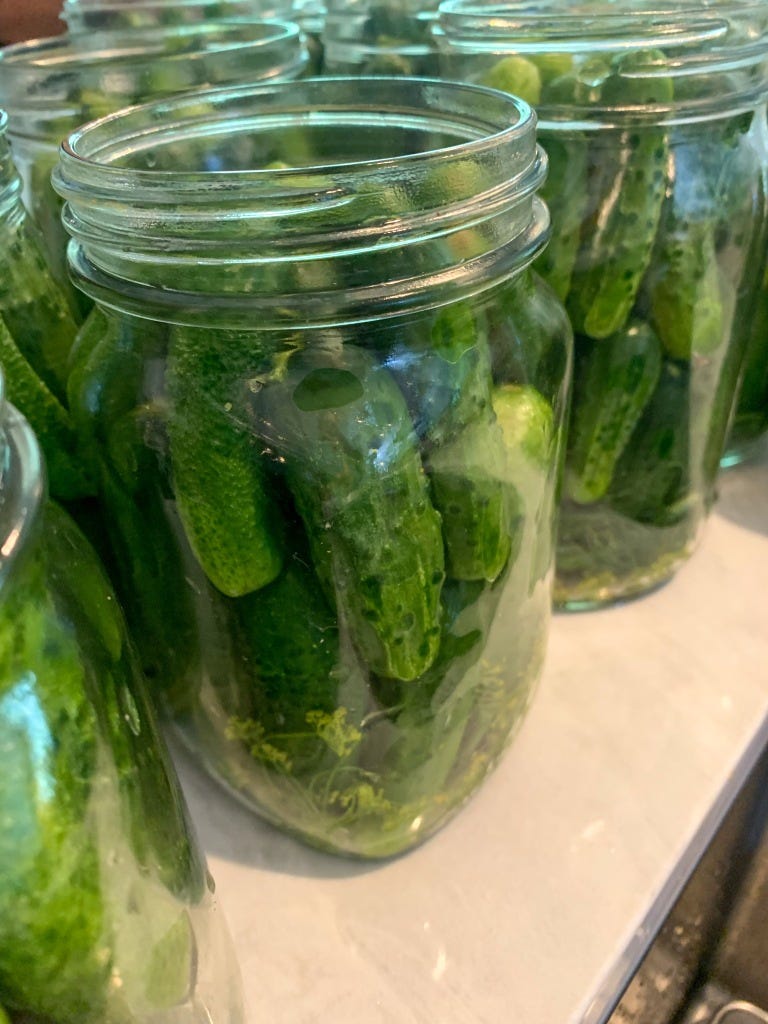
Once the prep is done, it is time to start filling the jars with cucumbers. Filling the jars is like a completing a puzzle. I find a way to fit as many cucumbers in the jar as possible for maximum pickles per jar. You may have to make more brine depending on how much gets poured into each jar as the volume will be different for each depending on the max pickles in the jars.
Add a couple garlic cloves and a couple stems of dill weed to the bottom of the jar. Then start to fill the jar with cucumbers, leaving about an 1/2 inch open at the top of the jar to allow for the brine to cover the cucumbers fully. Once all the jars are full, then I turn on the brine pot and the saucepan of lids to bring to the boil. Once the brine has boiled for approximately 5 minutes and lids are boiling, it is time to start filling the jars with the brine.
Fill the jars with the brine to just covering the cucumbers, leaving about 1/4 inch of space at the top. Place the snap lid on top, then screw on the screw lid finger tight. Place the jar on a bath towel and cover with another bath towel to keep warm. Proceed to the next filled jar. I allow the initial heat of the brine and keeping warm to help seal the lids. Wait to hear the POP of the lids. This is like music to your ears!! Some may not seal and that is ok as long as they are kept cool. I usually use those ones up first.
Now this is step that I DO NOT do because it can be finicky and make the pickles lose their crunch, but some may want to.
To process:
Place jars in canner filled halfway with warm water (120F- 140F). Then add hot water and to 1 inch above the jars. Heat the water to 180F - 185F for 30 minutes. Use a candy thermometer to maintain water temperature. If temperature gets higher than 185F, this may cause pickles to get soft.
Once the jars have cooled to room temperature, I place in a very cool place in the basement ( a cold room if you have one) or in a refrigerator. After 6 weeks, these dill pickles should be good to eat.
Benefits of Fermentation
Of course fermentation provides our gut with healthy bacteria. A healthy gut aids in digestion and weight loss, benefits our skin and improves mood amongst other benefits.
Leaving you with a few facts:
Did you know?
Cleopatra kept her beauty secret in a jar of pickles.
Pickles have been around as far back as 2030 B.C. The word pickle originated from the Dutch pekel and the German pókel, which is salt or brine. Pickling has been considered one of the best ways to preserve food, providing satiation for sailors, travelers and families in cold months.
Happy Pickling!
Danni
My mother-in-law preserves and cans food from her garden and I love it. Her pickles are especially delicious because she makes a variety of them - garlic, dill, sweet, and more. Thanks for sharing the easy recipe!
Oh, I love homemade pickles! They taste so much better than store bought. Bookmarking this recipe to make this summer!